Our recent blog series featuring the collaboration between MAGIC and the On The Line project has detailed the development of digital maps. Although we have given some technical detail in each post, I thought it would be fun to post a tutorial on how to create KMZ’s (for use in Google Maps and Google Earth) in ESRI’s ArcMap. For this exercise, I will create a map of Connecticut towns symbolized by total population.
1.Acquire Data: The first step in creating any cartographic project is to acquire the necessary data. For this project, I have downloaded Census data by town (county subdivision) from MAGIC’s GIS Data Page.
The shapefiles download will include shapefiles in both WGS84 and NAD83 coordinate systems. Once I download the shapefiles, I can add the P001 (which contains total population) WGS84 shapefile into ArcMap. If you are going to be working with MAGIC’s Census data, it is also important to download the spreadsheet data in addition to the shapefiles. The spreadsheet data contains a codebook that will allow you to interpret the field names of the shapefile attribute table.
2. Remove Counties Not Defined: There are 4 features in the Connecticut County Subdivisions data set that are not really towns, but are features that occupy the Long Island Sound area. In the Name10 field of the attribute table, I can see which these are.
To remove these, I need to write a simple Definition Query, which is done in the Properties menu of the layer. Click Apply or OK to save the changes.
3. Symbolize Layer(s): Now that I have only the 169 Connecticut towns displayed, I’m ready to symbolize the layer. This, like the Definition Query, is done in the Layer Properties. Click Apply or OK to save the changes.
4. Hide Unnecessary Labels: Next, I am going to hide all of the fields I do not want displayed in my final product (I only want the name of the town and total population). Under the Fields tab of the Layer’s Properties, I can uncheck the fields I don’t need or want to display. Click Apply or OK to save the changes.
5. Configure Pop-Up Labels: ArcMap allows you to export labels as pop up windows. This is done under the HTML Labels tab in the Layer’s Properties. By default, the field name will be included, but you can check the hide field name column if you don’t want it to display (as I have done). Click Apply or OK to save the changes.
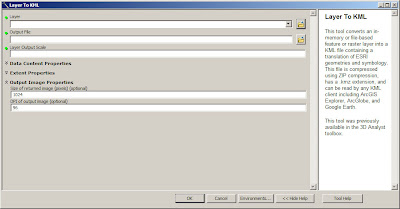
6. Export Layer/Map using Conversion To KML: There are two options to export your data; you can either export an individual layer or the whole map. If you choose Layer to KML you will need to browse to your layer, if you choose Map To KML you must browse to your .MXD file.
 |
| You can adjust the output scale as well as the resolution of your output in the Layer (or Map) to KML tool. |
7. Display in Google Earth: If you have Google Earth already installed on your computer, you should be able to double-click your new KML to open it.
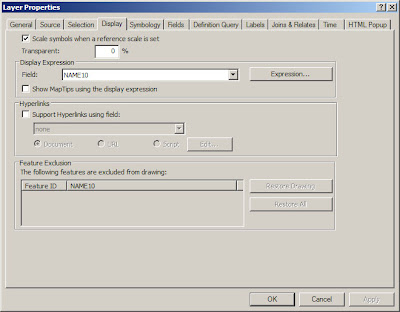
8. Clean up Labels: To give my labels a cleaner look, I’m going to reduce their redundancy. To do this, I must go back into ArcMap and ensure my primary label is set under the display tab of the Layer Properties menu. I chose the town name field.
 |
| Note: You can also adjust transparency under the Display tab. |
Then, I can turn the name field off. Click Apply or OK to save the changes.
Now, at least one of the repeated labels has been removed.
If you want to edit the labels in more detail, many times it will be more efficient to edit them in ArcMap using tools like the Field Calculator before exporting the layer or map.


